Tuesday, June 23, 2009

Vanilla Bean Panna Cotta

Panna Cotta 2
For those of you wondering Panna Cotta, according to Wikipedia, is an Italian dessert made by simmering together milk, cream, sugar and gelatin. Now, if I was to describe Panna Cotta to someone I would tell them its like if Jello was made with milk and was flavored vanilla, and had a less jiggly texture. I decided to make Panna Cotta because I wanted to try something different. I have been feeling more or less bored with baking. Although, cookies and cupcakes are my favorite desserts, they aren't exactly challenging. And even though, Panna Cotta is not difficult by any means, it is different, so I had to try it.

I used the recipe I found from Joy of Baking. I have mentioned that website before because there recipes are usually straightforward, come with a history of the dish (which is a personal favorite), and usually come out as expected. The recipe for Panna Cotta is no different. The only thing I changed was that I used vanilla bean paste to give the wonderful specks of vanilla bean seeds and make it extra luxe.

I molded it in silicone baking cups for ease of removal, although they did come out with those tell-tale lines. It took about 8 silicone muffin cups completly full to use all the mixture. I also did not use heavy cream, and instead used half and half mixed with whole milk, simply because I had no heavy cream.

I have to admit the Panna Cotta's were a little bland, and not very sweet. Some people like that they are not sweet, but I have a strong sweet tooth so it was lacking for me. Next time, I would probably make a flavored version like the Espresso Panna Cotta I almost made. To combat, the blandness I made a blackberry sauce, that was surprisingly simple. So after washing the very tart blackberries, I added sugar (maybe 1/8-1/4 cup) to them in a bowl. The sugar drew the water out of the blackberries making a sour/sweet fruit sauce in about 3 hours. I then drizzled the sauce over the Panna Cotta with a few blackberries. It really livened it up.

Recipe from Joy of Baking

Monday, June 22, 2009

Peanut Butter Buds!

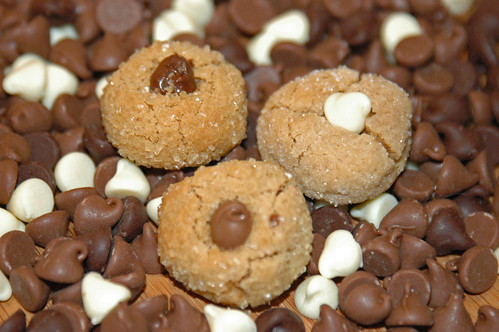
Peanut Butter Buds! They're chewy, crunchy, chocolaty, peanut butter drops of goodness, or in one word delicious. I found the recipe on the blog, 17 and Baking, and I just love her approach to baking. Seriously, check out her website.

Anyways, I followed her recipe, which you can also find a similar (OK, its pretty much the exact same thing,) recipe for Peanut Butter Blossoms, the big version of what I made today, on
Hershey's website using larger cookies and Kisses for the chocolate.
Peanut Butter Buds 3
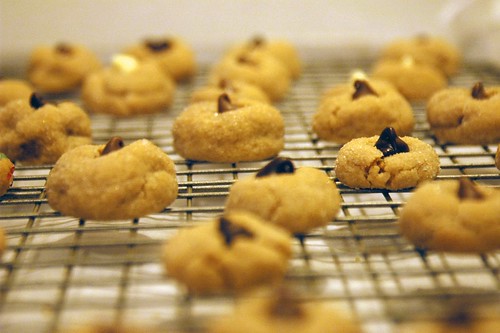
Anyways you combine the ingredients in normal cookie fashion. You then make smaller-than-bite-size balls using ,yes, only a quarter teaspoon! You then roll it in sugar. I first tried using coarse sanding sugar that was multicolored but I didn't think it looked like it should be on peanut butter cookies. I then used Sugar in the Raw, or turbinado sugar, which worked well until I ran out, so I ended up using just plain table sugar after that. Then you bake them for about 5-6 minutes although mine were all over the place, some took 7 minutes. Another batch took 4 minutes, but that is my oven for you.

Peanut Butter Buds 1
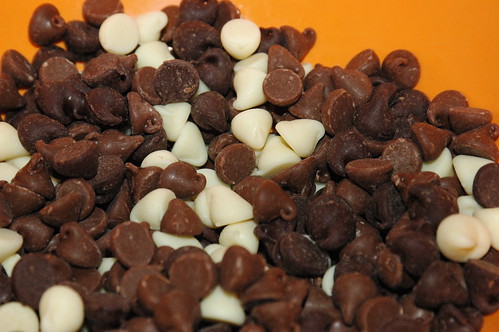
When they are out put a chocolate chip in the center of each one and press lightly, then let cool so the chocolate can re-harden. I used 3 types of chocolate chips on mine: semisweet, white, and milk chocolate.
DSC_0264-1
The recipe says it makes 15 dozen but my entire recipe only made barely 10 dozen, although, that could because my cookies were a little on the large size.

Either way, the cookies taste delicious and even if you make them full size, they will still taste delicious.


Peanut Butter Buds
Originally posted by Elissa at 17 and Baking
States it makes 15 dozen small cookies, varies depending on size

3/4 cup creamy peanut butter
1/2 cup shortening
1/3 cup granulated sugar
1/3 cup packed light brown sugar
1 egg
3 tbsp milk
1 tsp vanilla extract
1 1/2 cups all purpose flour
1/2 tsp baking soda
1/2 tsp salt
Granulated sugar for rolling
Chocolate chips (any type)

  1. Preheat the oven to 350 degrees F.
  2. Beat peanut butter and shortening until well mixed, then beat in the two sugars until light. Add the egg, milk, and vanilla and beat until fluffy.

  3. Whisk the flour, baking soda, and salt together, then add in 3 batches to the peanut butter mixture, beating well between additions.

  4. Using a 1/4 tsp, roll dough into 1/2 inch balls. Roll in granulated sugar and place on ungreased baking sheets. I recommend using parchment paper or a Silpat mat.

  5. Bake 5-6 minutes, on until slightly golden brownand remove from oven. Immediately press a chocolate chip into the center of each cookie. Let cookies cool a minute, then transfer to a wire rack to cool completely. [Note: the chocolate chip will be warm and gooey for some time, so be careful before stacking them.]

  6. Alternatively, roll heaped tablespoons of dough in sugar and place onto an ungreased cookie sheet and bake as directed. When baked press a Hershey's kiss into the center, in the fashion of the chocolate chips for Peanut Butter Blossoms.
Peanut Butter Buds 2ed


The cookies will keep for several days at room temperature in an airtight container.

Thursday, June 11, 2009

Scones and Lemon Curd, Two Ways

See, I had these 4 lemons that were begging to be used, and I needed something to make with them. So, I had the idea to make lemon curd. I had never made it before, but had been wanting to, so I though it would be the perfect time to make it.

But what to do with the curd? You can't really eat it straight, if you don't want an lemon overload. I thought about making lemon curd tarts, but decided I wanted to make tartlettes and I only have two tartlette pans, so I need to go buy a few more. Then, I thought about making biscuits but believe it or not I do not have a biscuit cutter or even a circle cutter. So I decided to make scones: those delicious, biscuit-y concoctions that are little wedges of goodness. Many of the recipes were flavored, which I did not want as it would clash with my scones, so I found this delicious sounding recipe that was plain but slightly sweet at Vintage Victuals. Her recipe is a traditional recipe from the British Isles for cream scones.

The scones came out, a little on the dry side and crumbly but I added extra butter because it didn't seem like it had enough, which could be why they were crumbly. I also had no heavy cream, or even half and half--bad planning on my part, so I ended up using skim milk (it was all we had) cut with a little bit of the more creamy part of melted butter. They cooked up perfectly. However, I thought I had baked them wrong. Turns out I didnt, but it led me to make a second batch using a diffrent recipe.

So then I looked in How to be a Domestic Goddess by Nigella Lawson because I thought it would have a really authentic recipe for scones. I used her recipe which had an insane amount of baking powder (like 2 tablespoons) and cream of tarter ( a whopping 4 teaspoons!) Those scones did call for an egg wash. I baked them, however they were more sticky and a quarter of them were left on the rolling board. They also called for both butter and shortening, and also contained no sugar in the recipe so they were not sweet at all. They were lighter, but not in a good way, but also somehow still tough.

I am partial to Vintage Victuals scone recipe, and actually the Domestic Goddess recipe scones were left uneaten and had to be thrown away.

The lemon curd is a recipe from Joy of Baking. I looked long and wide for a good curd recipe, although I really did not know what I was looking for since I had never made it. I chose Joy of Baking because other things I have made from them have turned out well with little fine tuning, and it didn't seem like it made too much. It also only called for a third of a cup of lemon juice which was all I had fresh.

Well, I made the first batch correctly, and it thickened properly but when I went to go to taste it, all I tasted was metal. It was because I had made it with an aluminum bowl and it had absorbed some of the taste. So I made a second batch, but I had no zest left over, and was very scant on the lemon juice. To compensate I downed the sugar and butter a bit. However, it did not thicken as much as the other batch did, but that could be it never got hot enough because I used a plastic bowl this time. The second batch was sweeter however, and so I liked it better. Also, the first batch lost most of the metallic taste as it cooled down.

The lemon curd with the scones was delicious by the way. The scones made with the Vintage Victuals recipe were crumbly and delicious and with a smear of jam and cream cheese were delicious. If I could afford the devonshire (clotted) cream at the grocery store, it would have been heavenly. See devon cream is like mayo textured but very sweet and just heavenly on scones, at least that's what it said on a website I went to. However, it is only made in a section of England. You also can not make it yourself as it needs unpasteurized cream to make, well unless you live on a farm where you can get unpasteurized milk. So naturally, its a little pricey. You could try putting a dollop of whipped cream on the scone for the same sweet, milky coolness. I also dipped some of the scone in some strong earl grey tea and it just absorbed the flavor of the tea wonderfully,

Try making the scones today. They are delicious for breakfast, brunch, afternoon snack or dessert.


Authentic British Cream Scones
Adapted from Vintage Victuals

1 3/4 cups flour
1 tablespoon baking powder
1/2 teaspoon salt
1/4 cup sugar
1/2 butter (1 stick)
1/4 cup heavy cream ( could substitute half and half, whole milk or even skim if mixed with a little melted butter)
1 large egg

  1. Preheat oven to 425 degrees.
  2. Sift together the flour, baking powder, salt, and sugar.
  3. Cut in the butter until it's chunky. I used a wire pastry blender.
  4. Combine the cream and the egg, beating lightly. Add to the flour mixture and stir with a fork very lightly. Turn the crumbly dough out onto a floured surface and knead gently 5 to 6 times, just until the dough comes together. (I did this on a floured surface as the dough was a little sticky. It helped because I did not flour the surface for Nigella's scones and 2 of them were left of the table because they stuck).
  5. Roll until around 1-1.5 inch thick. Use a sharp knife ( I used a dough blade) to cut into even sized triangles. Place the wedges on a greased cookie sheet ( I just used parchment paper), and bake for 12-15 minutes. The tops will turn lightly golden. Allow to cool for 10 minutes.

Monday, June 08, 2009

Things I Would Love to Make

This is a list I have been meaning to make for a long time, of all the different items I have been meaning to make. Some I have made before, just not in a long time, although many I have never made. If anyone has any recipes for any of the following items feel free to share or link to in the comments. I would love to hear them!


  1. Key Lime Pie
  2. Tiramisu
  3. Yeast Bread
  4. Donuts*
  5. Cannolis
  6. Tuiles
  7. Tres Leches Cake
  8. Pizza Crust
  9. Pumpkin Bread
  10. Lemon Meringue Pie
  11. Cranberry Cake
  12. Madeleines*
  13. Short bread
  14. Flag Cake
  15. Scones
  16. Fig and Goat Cheese Tarts
  17. Cheese Danish
  18. Eclairs
  19. Homemade Flan
  20. Granita
  21. Marshmallows
  22. Savory tarts
  23. Churros
  24. Ice Cream*
  25. Rhubarb Crisp
  26. Fondant covered anything*
  27. Petit Fours
  28. Cheese Muffins
  29. Bombe glacée
  30. Meringue cookies
  31. Cookie Dough Cupcakes
  32. Panna Cotta
  33. Graham Crackers
  34. Lemon Curd

* do not have required equipment

Baking Escapades

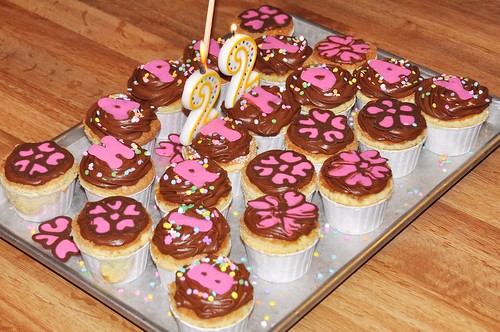
So, here are some pictures of random baking endeavors. Most of these were for birthdays, although some were just because. There has been much more than this, although these were relatively aestically appeasing compared to some. Others simple were gobbled up too fast to be photographed.

Birthday Cupcake D
Yellow Butter Cake, with homemade fudge icing. The letters and flowers are made out of candy melts which I used to draw over wax paper.


Cappucino Cupcakes 2
Cappucino Cupcakes 1
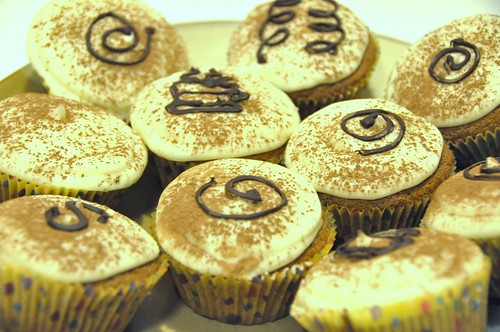
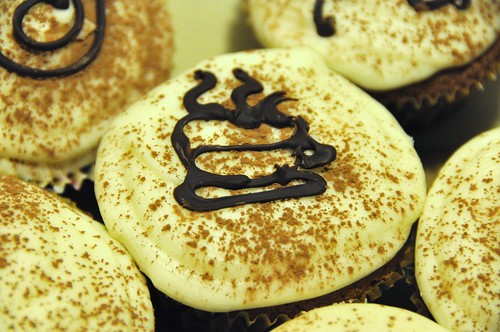
Espresso flavored sponge cake, with white chocolate sour cream frosting, with bittersweet chocolate onlays. Yes I drew all of those by hand, without a pattern. I just melted some bittersweet chocolate, then I put it into a zip baggie--no need to waste those expensive disposable piping bags, then I piped it out onto wax paper and let it dry. The cappuccino cups are my favorite but they were very hard to transfer without breaking.

Strawberry Cupcake 1

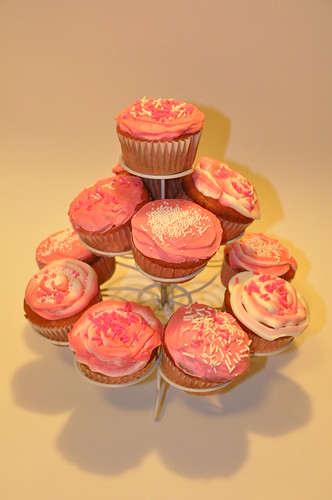
These were strawberry cupcakes, made on a whim one Sunday night, that I decorated using my gradient frosting technique. The frosting is vanilla. I decorated them with various pink and white jimmies and non-perials.

Birthday Cupcake F
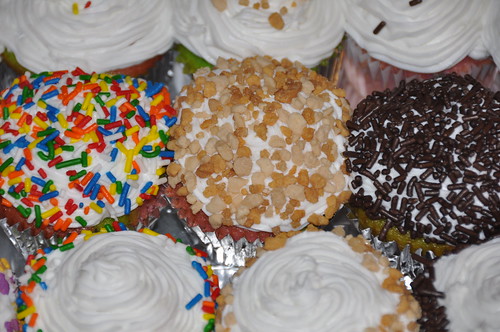
These were cupcakes I made for my friends birthday. They are vanilla cake with vanilla frosting, however the vanilla cake was colored 4 different neon colors and then marbled together in the cupcake cup. You can see a hint of it in the photo. I then decorated them with various types of sprinkles including crunchy rainbow, soft chocolate jimmies, praline crunch, and neon dinosaur confetti. Some had lots of sprinkles and some had very few. My friend loved them when I gave them to her in first period, and by 5th they were gone!


Some of the things that didn't get photographed: vanilla bean cheesecake, blackberry butter cream vanilla cupcakes, chocolate chip muffins, banana bread, espresso chocolate cake,apple pocket pie, blackberry tart, peanut butter cup cookie dough mini cupcakes, blueberry crumb pie, red velvet cupcakes, cupcake bites, and more.

Sunday, June 07, 2009

Pictures are Coming!Here!

Cupcake Cookies
Ahh, yes. I know, I know. I have said pictures would be up many, many times. Well this week they will actually be put up. I even have the pics on my computer now!
I would have done it sooner, but school with AP exams, and then plain Honors exams, last projects, and getting everything in check with final grades, is a big time consumer. But guess what? School is out, for the summer! Ok well only partially for me as I have 2 summer assignments and a complete online class. I feel like I am repeating my self, like I have said this on the blog before. Excuse me if I am.

But now, I have much more time. Which means more blogging, more baking, and more time.

See, it has always been such a hassle to get the pictures up on the blog because I use my father's DSLR, so its not mine so I do not know how to upload the pictures on to my computer (nor would my bipolar computer let it anyways), so eventually when he uploads them to his computer, when it is not at work with him, I have to get the pictures on it, copy them to a thumb drive, take the drive to my computer load them on it (a feat in and of itself with this sorry excuse for a computer). Then I have to pick proper photos, upload them to a third party site and then put them back in to this blog.

Exhausting, I know, but its a labor of love.


UPDATE: Pictures are up so look on the homepage for various photos, on some posts!